REPL
In this guide, you will learn about the following topics:
- Starting and navigating the REPL session
- Importing modules and accessing services
- Using built-in helper methods
- Accessing command history and results
- Adding custom REPL methods
- Working with the editor mode
Overview
The AdonisJS REPL extends the standard Node.js REPL with application-aware features that make it easy to interact with your codebase. Unlike the basic Node.js REPL, the AdonisJS REPL boots your application, loads its services, and provides convenient shortcuts for common tasks.
The REPL is particularly useful during development for quick experimentation, debugging, and data exploration. You can import TypeScript files directly, access container services without manual imports, create class instances through the IoC container, and extend the REPL with custom methods specific to your application.
Starting the REPL session
You can start the REPL session using the node ace repl command. This boots your AdonisJS application and opens an interactive prompt where you can execute code.
node ace repl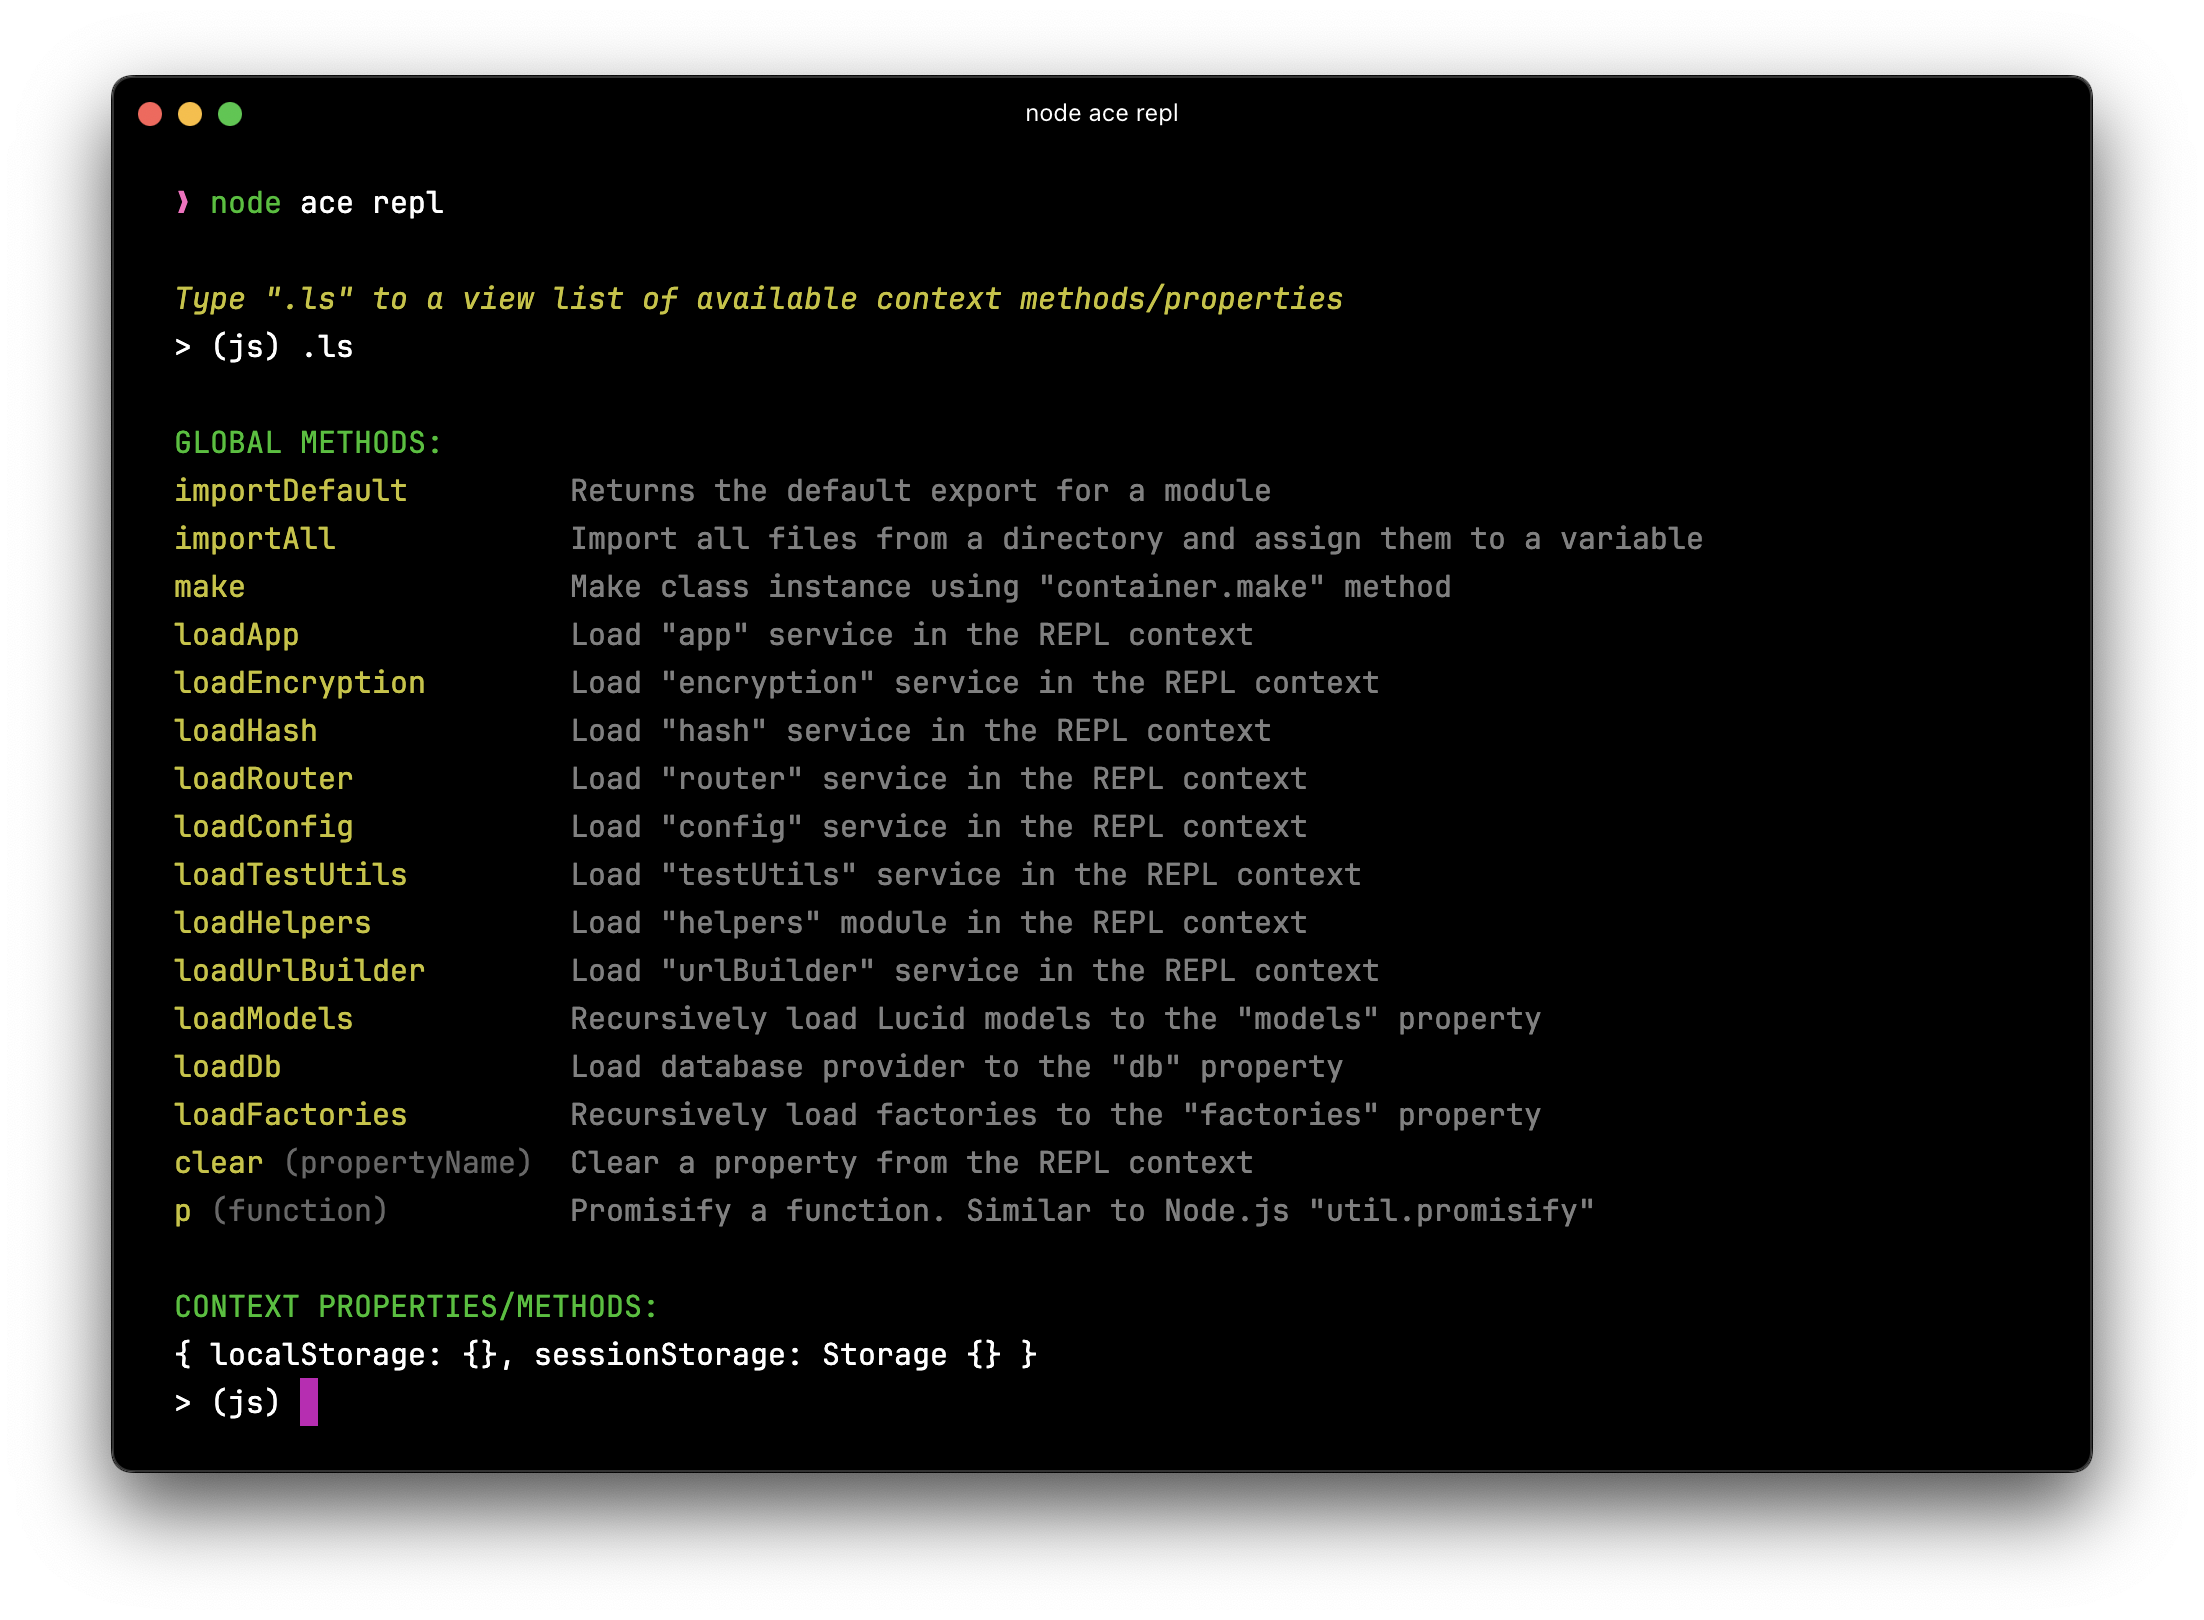
Once started, you'll see a prompt where you can type JavaScript code and press Enter to execute it. The output appears immediately on the following line, creating a fast feedback loop for testing and exploration.
Using editor mode
While the REPL is great for single-line expressions, you sometimes need to write multi-line code blocks. The editor mode allows you to write multiple lines of code before executing them.
Enter editor mode by typing the .editor command at the REPL prompt.
> (js) .editor
# // Entering editor mode (Ctrl+D to finish, Ctrl+C to cancel)
In editor mode, you can write multiple lines of code. Press Ctrl+D to execute the entire code block, or press Ctrl+C to cancel and exit editor mode without executing anything.
> (js) .editor

# // Entering editor mode (Ctrl+D to finish, Ctrl+C to cancel)
const users = await User.query()
  .where('isActive', true)
  .orderBy('createdAt', 'desc')
  .limit(10)

console.log(`Found ${users.length} active users`)
# // Press Ctrl+D to execute
Accessing previous results
The REPL provides special variables for accessing results and errors from previously executed commands, eliminating the need to re-run code when you forget to store a value.
Accessing the last result
If you execute a statement but forget to assign its result to a variable, you can access it using the _ (underscore) variable.
> (js) helpers.string.random(32)
# 'Z3y8QQ4HFpYSc39O2UiazwPeKYdydZ6M'

> (js) _
# 'Z3y8QQ4HFpYSc39O2UiazwPeKYdydZ6M'

> (js) _.length
# 32
This is particularly useful when you want to perform additional operations on a result without re-executing the original command.
Accessing the last error
Similarly, you can access any exception raised by the previous command using the _error variable. This is helpful for inspecting error details without cluttering your code with try/catch blocks.
> (js) helpers.string.random()
# Error: The value of "size" is out of range...

> (js) _error.message
# 'The value of "size" is out of range. It must be >= 0 && <= 2147483647. Received NaN'

> (js) _error.stack
# (full error stack trace)
Navigating command history
The REPL maintains a history of all commands you've executed, saved in the .adonisjs_v7_repl_history file in your home directory. This allows you to recall and re-execute previous commands without retyping them.
You can navigate through command history in two ways:
-
Arrow key navigation: Press the up arrow
↑key to cycle through previous commands one at a time. Press the down arrow↓to move forward through the history. -
Search mode: Press
Ctrl+Rto enter reverse search mode, then type characters to search for matching commands in your history. PressCtrl+Ragain to cycle through multiple matches.
> (js) [Press Ctrl+R]
(reverse-i-search)`query': const users = await User.query()
Exiting the REPL session
You can exit the REPL session either by typing .exit or by pressing Ctrl+C twice in quick succession to exit.
> (js) .exit
# Goodbye!
When you exit, AdonisJS performs a graceful shutdown, closing database connections and cleaning up resources before the process terminates.
Note that the REPL session does not automatically reload when you modify your codebase. If you change your application code, you must exit and restart the REPL session for the changes to take effect.
Importing modules
Node.js does not support import statements in REPL sessions, so you must use dynamic import() expressions instead. When importing, you need to destructure the module exports or access specific properties.
> (js) const { default: User } = await import('#models/user')
# undefined

> (js) await User.all()
# [User, User, User, ...]
The syntax const { default: User } destructures the default export from the module. This can be verbose when you only want the default export.
Using the importDefault helper
To simplify importing default exports, the REPL provides an importDefault helper method that automatically extracts the default export.
> (js) const User = await importDefault('#models/user')
# undefined

> (js) const Post = await importDefault('#models/post')
# undefined

> (js) await Post.query().where('published', true)
# [Post, Post, Post, ...]
This is particularly convenient when working with models, services, or any modules that export a single default value.
Using helper methods
The REPL includes several built-in helper methods that provide shortcuts for common tasks like importing services, making class instances, and managing the REPL context.
You can view all available helper methods by typing the .ls command.
> (js) .ls

# GLOBAL METHODS:
importDefault         Returns the default export for a module
make                  Make class instance using "container.make" method
loadApp               Load "app" service in the REPL context
loadEncryption        Load "encryption" service in the REPL context
loadHash              Load "hash" service in the REPL context
loadRouter            Load "router" service in the REPL context
loadConfig            Load "config" service in the REPL context
loadTestUtils         Load "testUtils" service in the REPL context
loadHelpers           Load "helpers" module in the REPL context
clear                 Clear a property from the REPL context
p                     Promisify a function. Similar to Node.js "util.promisify"
Loading services
Instead of manually importing services, you can use the load* helper methods to load them into the REPL context.
> (js) await loadRouter()
# Imported router. You can access it using the "router" property

> (js) router.toJSON()
# { routes: [...], ... }

> (js) await loadHash()
# Imported hash. You can access it using the "hash" property

> (js) await hash.make('secret')
# '$argon2id$v=19$m=65536,t=3,p=4$...'
Each load* method imports the corresponding service and makes it available as a property in the REPL context, eliminating the need for import statements.
Making class instances
The make method uses the
IoC container to create class instances with automatic dependency injection.
> (js) const userService = await make('App/Services/UserService')
# undefined

> (js) await userService.findById(1)
# User { id: 1, email: 'user@example.com', ... }
This is useful when you want to test services or classes that have constructor dependencies, as the container automatically resolves and injects them.
Promisifying functions
The p method promisifies callback-based functions, similar to Node.js util.promisify.
> (js) const readFile = p(fs.readFile)
# undefined

> (js) await readFile('package.json', 'utf8')
# '{ "name": "my-app", ... }'
Adding custom REPL methods
You can extend the REPL with custom methods specific to your application. This is useful for creating shortcuts that you use frequently during development, such as loading all models or seeding test data.
Custom methods are typically defined in a preload file that runs only in the REPL environment.
Creating a REPL preload file
First, generate a preload file configured to run only in the REPL environment.
node ace make:preload repl -e=repl

# CREATE: start/repl.ts
Defining a custom method
In the preload file, use repl.addMethod to define custom methods. For example, let's create a method that imports all models from the app/models directory.
import app from '@adonisjs/core/services/app'
import repl from '@adonisjs/core/services/repl'
import { fsImportAll } from '@adonisjs/core/helpers'

/**
 * Add a method to load all models at once
 */
repl.addMethod(
  'loadModels',
  async () => {
    /**
     * Import all files from the models directory
     */
    const models = await fsImportAll(app.makePath('app/models'))

    /**
     * Make models available in the REPL context
     */
    repl.server!.context.models = models

    /**
     * Notify the user that models are loaded
     */
    repl.notify(
      'Imported models. You can access them using the "models" property'
    )

    /**
     * Display the prompt again
     */
    repl.server!.displayPrompt()
  },
  {
    description: 'Load all models from app/models directory',
    usage: 'await loadModels()'
  }
)
The repl.addMethod accepts three parameters:
- Method name: The name you'll use to call the method in the REPL
- Implementation: An async function that performs the action
- Options (optional): An object with
descriptionandusageproperties that appear in help output
Using your custom method
After restarting the REPL session, your custom method becomes available.
node ace repl

> (js) .ls
# GLOBAL METHODS:
# loadModels            Load all models from app/models directory
# ...

> (js) await loadModels()
# Imported models. You can access them using the "models" property

> (js) Object.keys(models)
# ['User', 'Post', 'Comment', ...]

> (js) await models.User.all()
# [User, User, User, ...]
You can define multiple custom methods in the same preload file to create a comprehensive set of development shortcuts tailored to your application's needs.